Follow Us on Pinterest
Unable to load Pinterest pins for 'FrancesSuzanne'

Jul
17
Hopefully by now, you have practiced your cable stitch and have been bitten by the “smocking bug”!
Today, we will be discussing another stitch used in smocking . . . THE WAVE STITCH . . . bringing our total to two stitches. What’s more exciting is that most smocking is comprised of ONLY three stitches in varying combinations, lengths and widths. So, we are two-thirds of the way there! Easy peasy!
There is a bit of differing terminology when referencing the wave and trellis stitches {the third stitch to come in the series}. Some use the term, “wave”, to refer to both of these zig-zag / chevron-looking stitches {sometimes as baby wave and wave}. Others use the terms, “wave” and “wave trellis”. And, then there are those who use the terms, “wave” and “trellis”. In all cases, these stitches are referring to the zig-zag stitches used in smocking. They move up and down as a wave or trellis would move.
Today, we will be sharing the “wave” {or baby wave} stitch. Be sure to watch our video here for a play-by-play of this stitch.
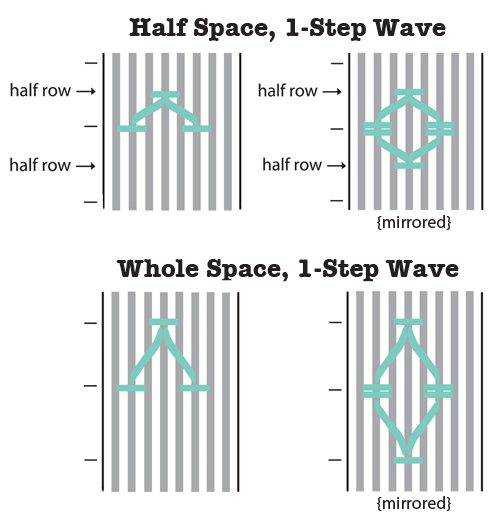
Our first version is a basic, half-space wave, which means it will cover HALF the space between 2 gathering rows.
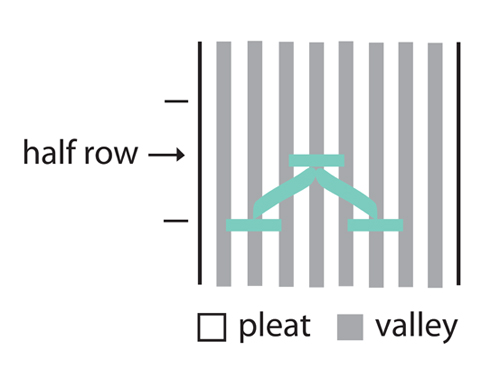 As a written instruction, this might read: “Work a 1/2-space, 1 step wave between rows 3 and 3 1/2″. Begin the process with one “UP cable” on Row 3, then with your thread above your needle, find the halfway point (Row 3 1/2) between the gathering rows. Insert your needle at an angle that is parallel to the gathering rows and perpendicular to the pleat, that is approximately 1/3 the depth of a pleat. Next, stitch a “DOWN cable”. Now, with your thread below your needle, stitch a wave stitch up to Row 3.
Rule of thumb while stitching the wave and trellis stitches: When working stitches that are going UP, your thread should be BELOW your needle. When working stitches that are going DOWN, your thread should be ABOVE your needle.
Our second version will be a basic, whole-space wave, which means it will cover the ENTIRE space between 2 gathering rows.
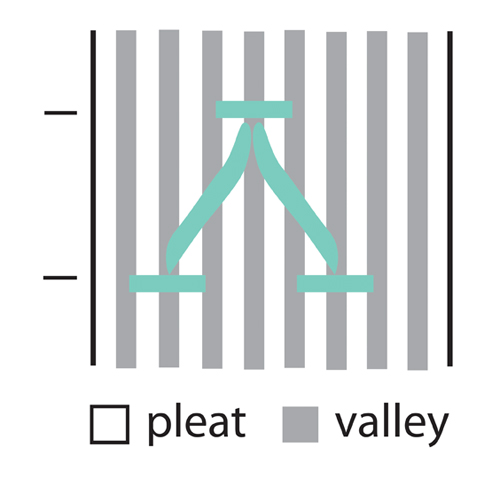 As a written instruction, this might read: “Work a 1-space, 1 step wave between rows 3 and 4″. Begin the process with one “UP cable” on Row 3, then stitch down to Row 4, pulling 2 pleats together. Remember to insert your needle at angle that is parallel to the gathering rows and perpendicular to the pleat, that is approximately 1/3 the depth of a pleat. Next, stitch a “DOWN cable”. Then, with your thread below your needle, stitch a wave stitch up to Row 3.
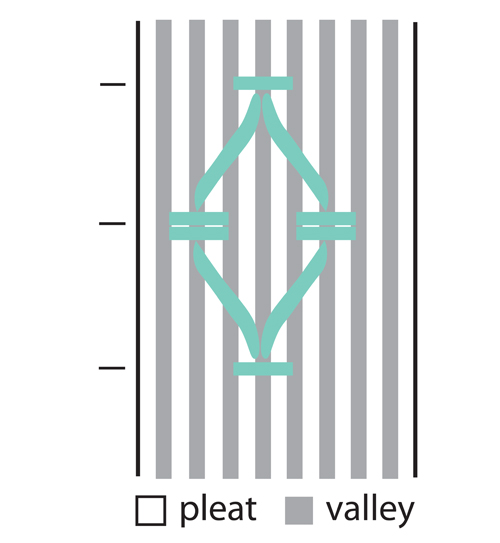
Now, what about the diamonds? This was something that when we first began smocking came as somewhat of a shock to us. You don’t smock diamonds.
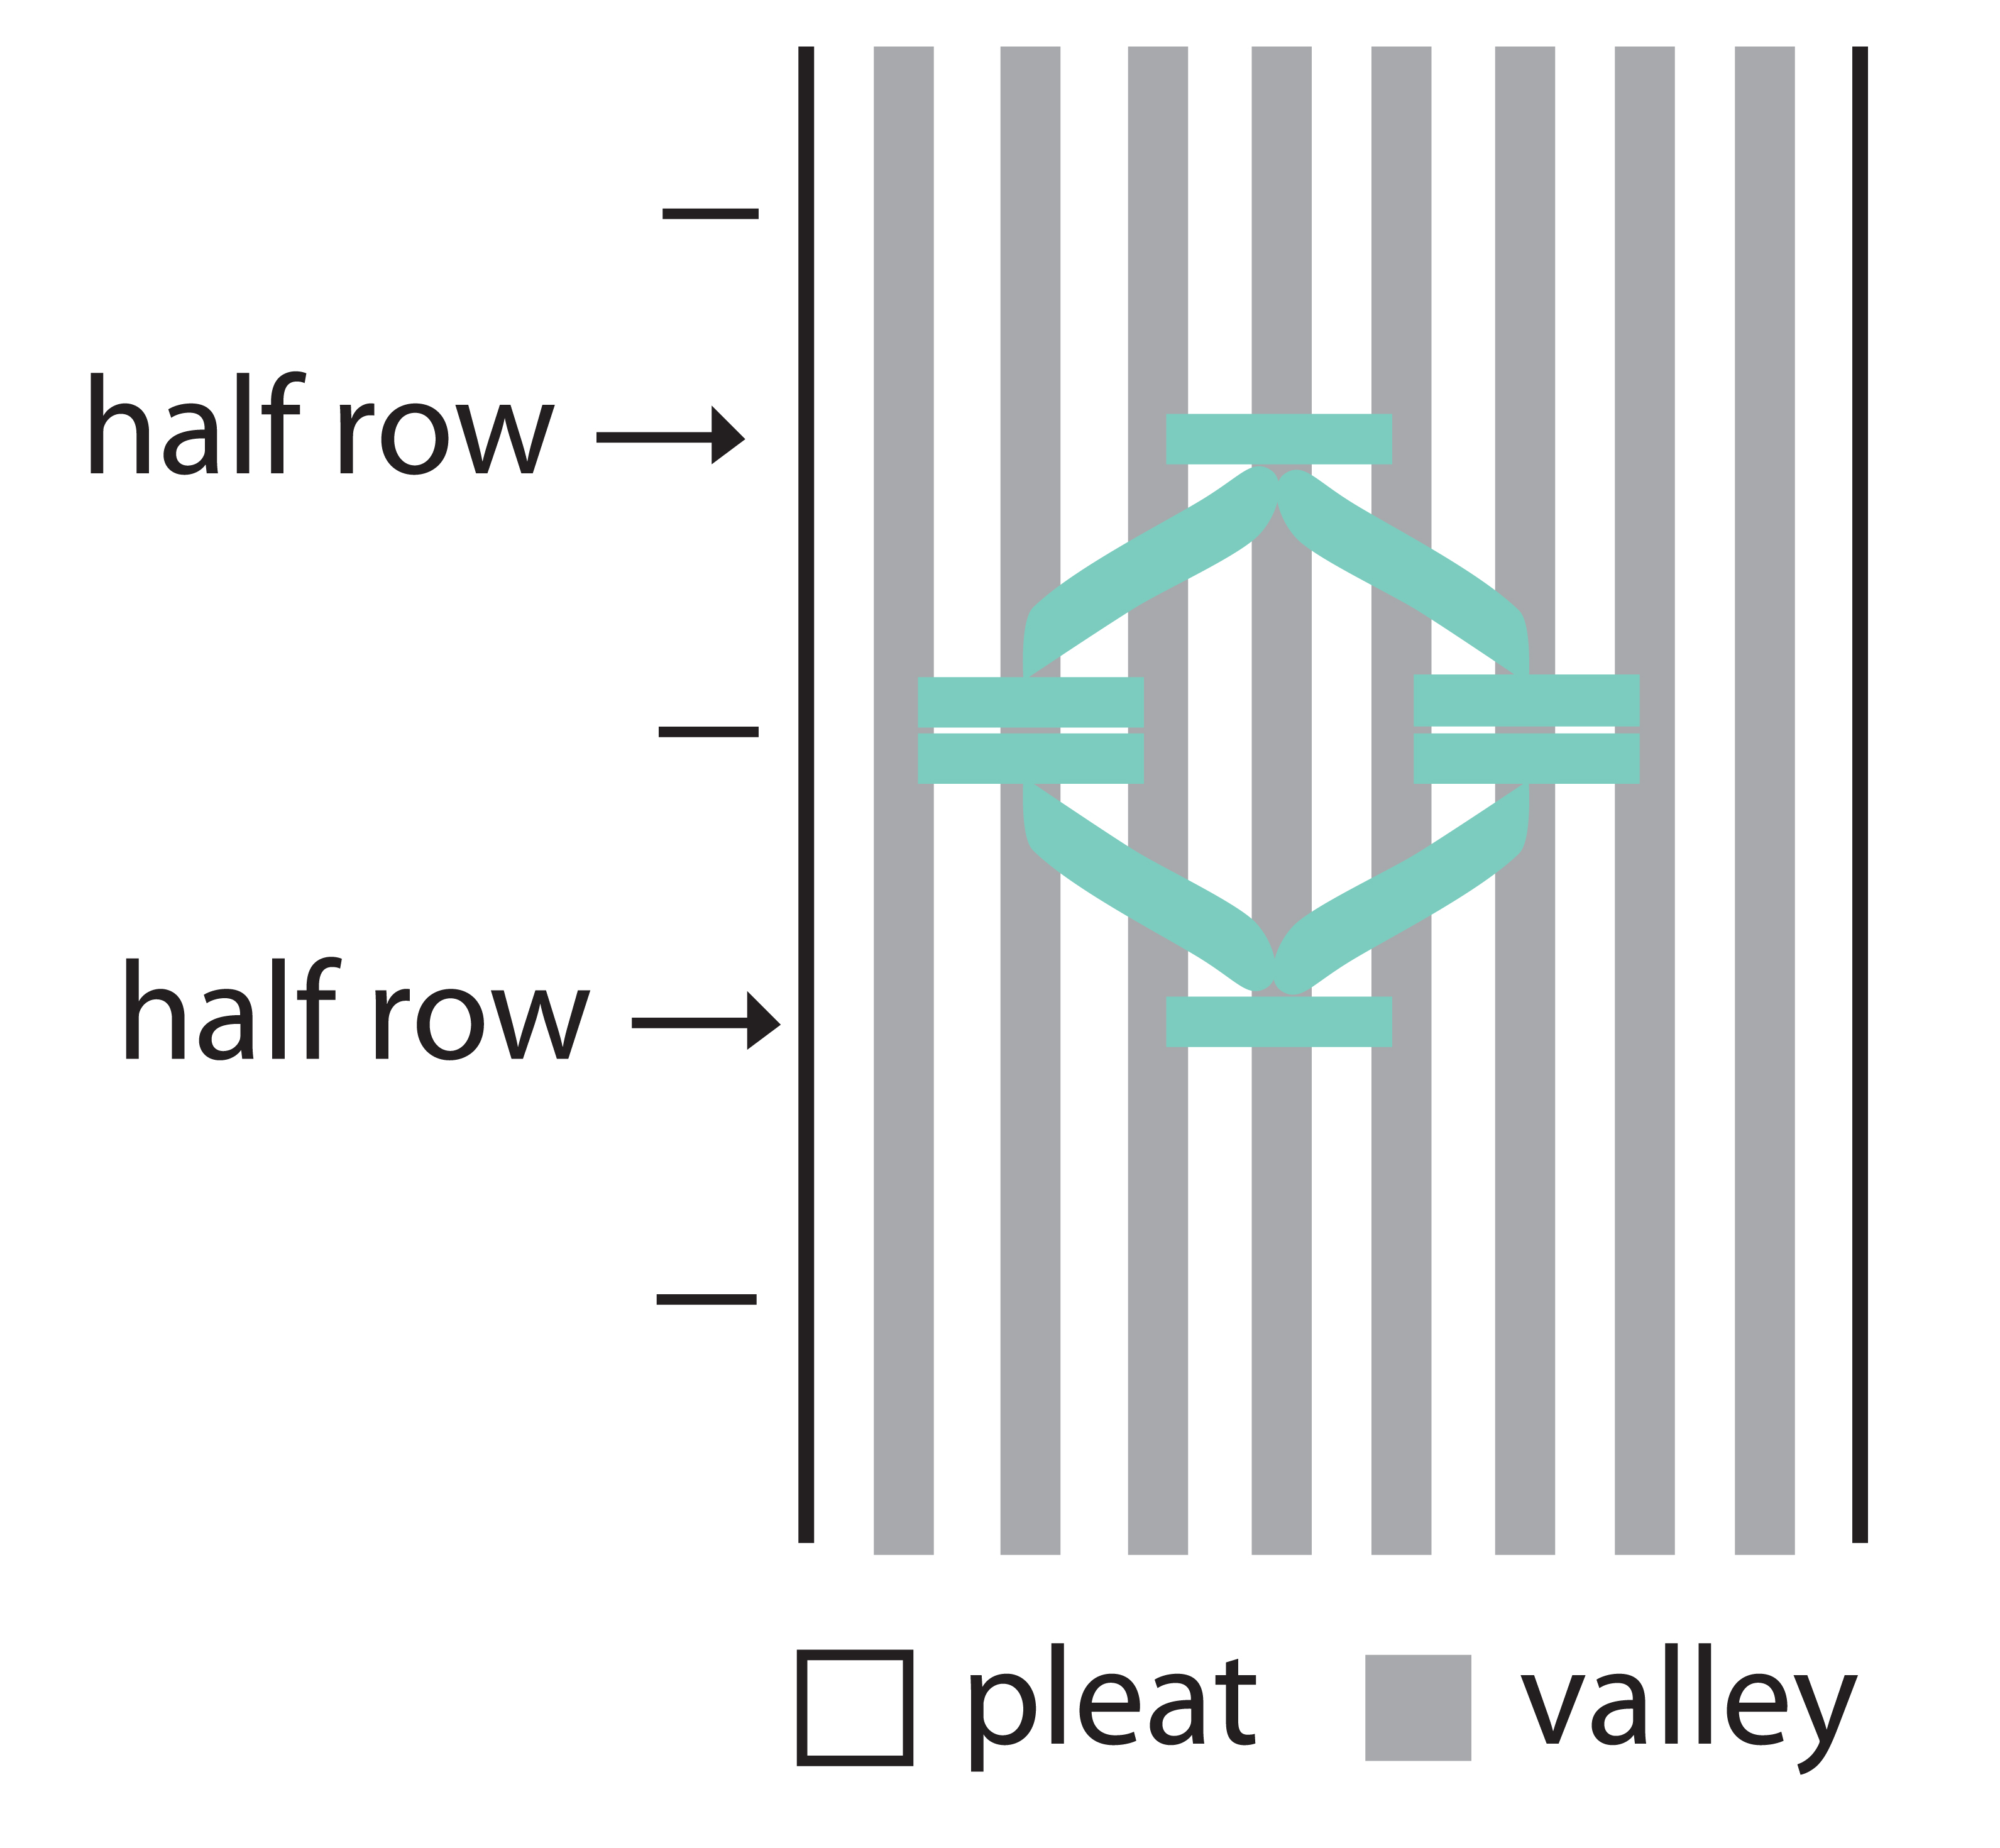 Rather, you smock rows of waves or trellis stitches, and then mirror those rows to form diamonds. Pretty snazzy, huh? And, no additional stitches are necessary!
So what are you waiting for? Give it a try! We’d love to see your work, so please tag us on facebook, instagram or shoot us an email! And stay tuned because the trellis stitch will be taking center stage next. . .
Missed a post on “Beginning Smocking”?
View them here:
Smocking: Preparation and Your First Stitch {*two videos included in this post}
If you like what you see, PLEASE…..

![]()