• Home
  • Blog
    • Frances Suzanne
    • Flip this Pattern
  • Flip this Pattern
    • Overview
    • Competitor Flips
    • Sew-Alongs
  • Tutorials
    • Sewing
    • Smocking
    • Free Patterns
  • Heirloom
  • Recipes
  • Contact


Aug
18

2 Comments

Tutorial: Adding a Placket to the O+S Swingset Tunic


Oliver + S, Swingset Tunic and Class Picnic Shorts

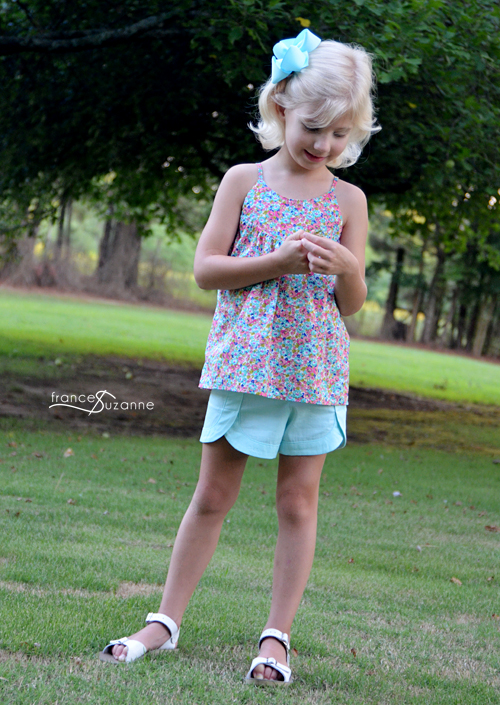
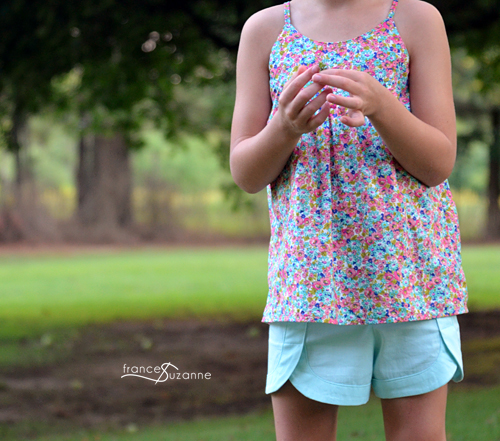
It’s been said before: We LOVE the Oliver + S, Swingset Tunic and Skirt pattern!!  It’s a winner in our books . . .

Oliver + S, Swingset Tunic and Class Picnic Shorts

However, we’ve been stalking the Oliver + S discussion boards on “How to get a cleaner finish” when attaching the bodice and ruffle skirt areas.

Oliver + S, Swingset Tunic and Class Picnic Shorts

Since we couldn’t find too much information regarding the process, we decided to give it a go and do a little tutorial of our own.

Adding a Placket {Oliver + S, Swingset Tunic}

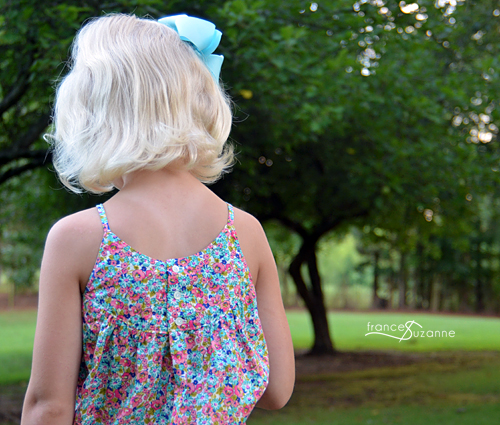
And while adding a placket to the swingset tunic is completely unnecessary for fit purposes, it actually helps our “big headed” niece that tends to have anxiety while removing garments from said “big head.”

Oliver + S, Swingset Tunic and Class Picnic Shorts

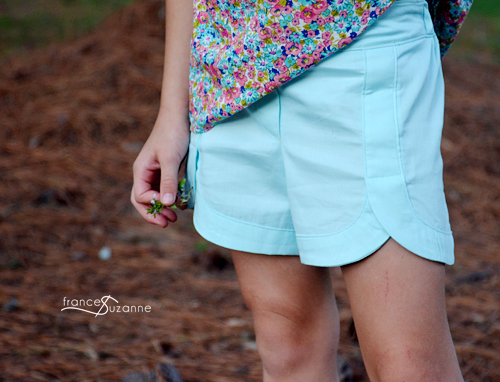
For this outfit, we paired the Oliver and S, Swingset Tunic with the Oliver and S, Class Picnic Shorts. That “robin’s egg blue” gets us . . .EVERY. SINGLE. TIME!!  Swoon. . .

Oliver + S, Swingset Tunic and Class Picnic Shorts
Adding a placket to the Oliver + S, Swingset Tunic:
{directions may also be used to add a placket to other garments with a bodice and skirt}

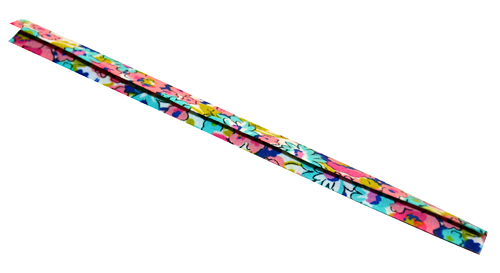
Cut 1 placket piece, 1 1/2″ x 6 {this will make a 2.5″ placket once completed}. If you want a deeper placket, cut a longer piece. *You may always cut the placket slightly larger than the 6″ stated to allow room for error. Any excess you have will be trimmed at a later step.

Iron placket in half, wrong sides together. Open the placket, and press placket piece once again. This time, from both sides – meeting in the center pressed crease. Refold all pressed areas, and press once more to create a narrow placket piece. Open, and set aside.

Adding a Placket {Oliver + S, Swingset Tunic}

Please note: The placket’s purpose is to “finish” the opening . . . not for ease of dressing oneself. This garment allows plenty of room for dressing ease, without the addition of a placket.

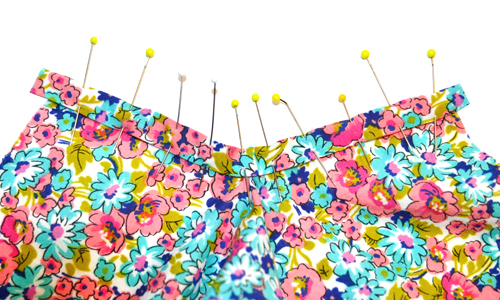
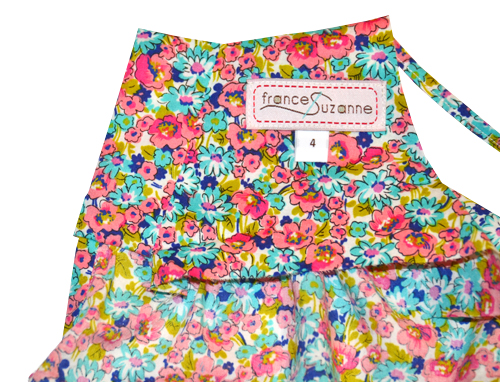
Draw a 3″ line down the center back ruffle. Mark 1/4″ on both sides of center back line and draw a line from each to the end of the 3″ line.

Adding a Placket {Oliver + S, Swingset Tunic}

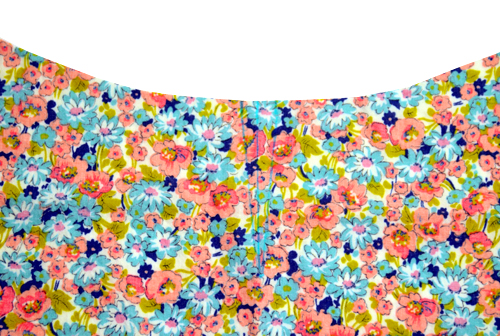
Stay-stitch the two angled lines, pivoting at the point {needle down, one stitch on the pivot}.

Adding a Placket {Oliver + S, Swingset Tunic}

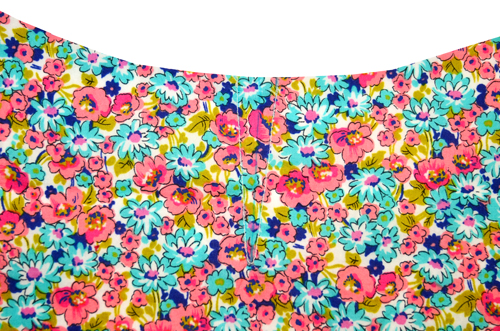
Cut the center line, being careful not to cut into the stay-stitching.

Adding a Placket {Oliver + S, Swingset Tunic}

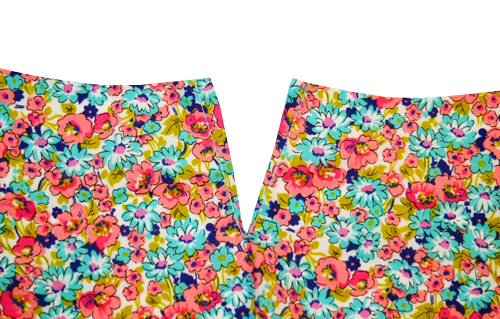
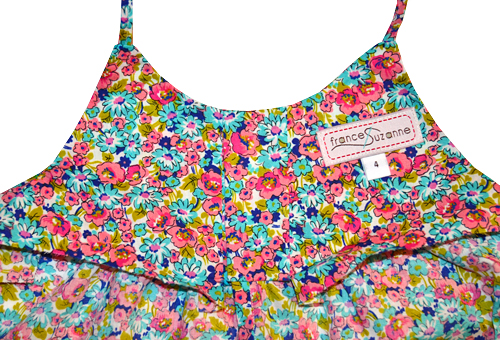
Pin the RIGHT side of the opened placket piece to the WRONG side of the tunic ruffle, along the staystitching – spreading the center cut area to create a straight line. Unfold placket and align the outer crease with the staystitched line of the ruffle. Due to the angle of the staystitched line, the width of the ruffle seam will vary {but the placket seam will be consistent}. Stitch in place, following previously sewn stay-stitching.

Adding a Placket {Oliver + S, Swingset Tunic}

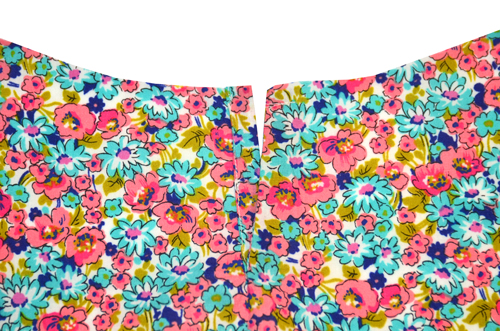
Press seam away from tunic ruffle.


Adding a Placket {Oliver + S, Swingset Tunic}

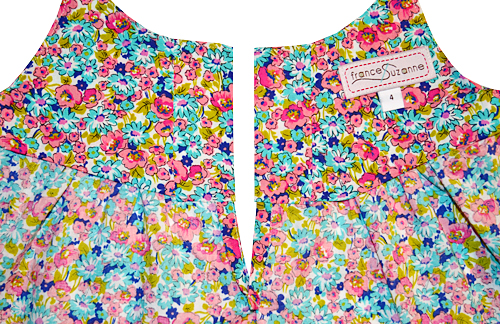
Refold placket over ruffle’s raw edge, and pin the remaining folded placket edge over the stitching line.

Adding a Placket {Oliver + S, Swingset Tunic}

Edgestitch along fold, trim any remaining excess along the top, and press to finish.

Adding a Placket {Oliver + S, Swingset Tunic}

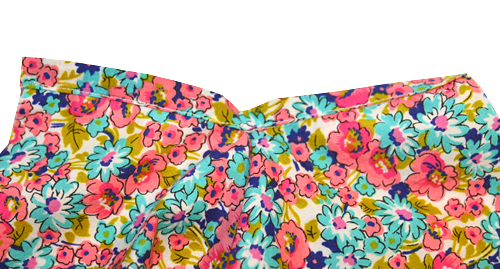
Fold ruffle with right sides together. Stitch lower placket edge at a 45 degree angle {see blue marking on photo below}. Backstitch, both at the beginning and end of this area.


Adding a Placket {Oliver + S, Swingset Tunic}

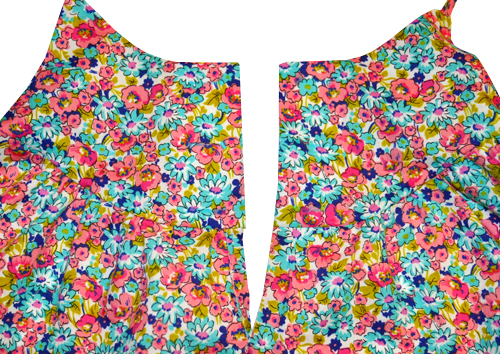
Iron the wearer’s right side of the placket to the wrong side, while leaving the left side of the placket unfolded. Baste the folded edge of the placket to hold in place.

Adding a Placket {Oliver + S, Swingset Tunic}

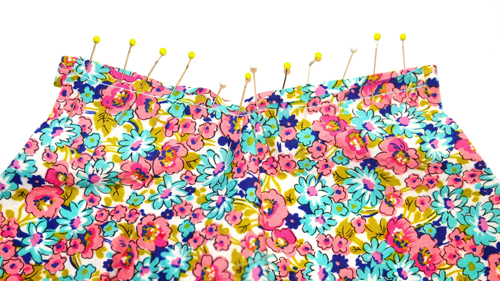
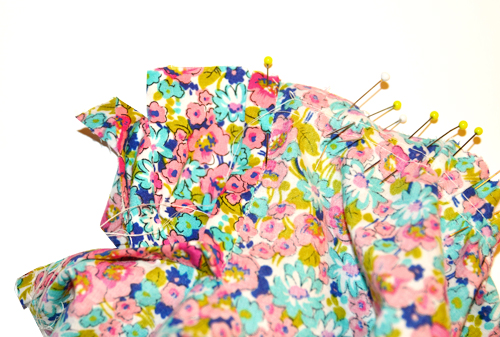
Pin left side of  back bodice to left side of tunic ruffle, right sides together, gathering ruffle to fit bodice. The ruffle will stop at the bodice’s facing fold line. Wrap bodice facing around tunic ruffle, aligning folded bodice edge with ruffle placket {flush with one another}, with ruffle being sandwiched between right sides of bodice.

Repeat for the wearer’s right side of the bodice and tunic ruffle.

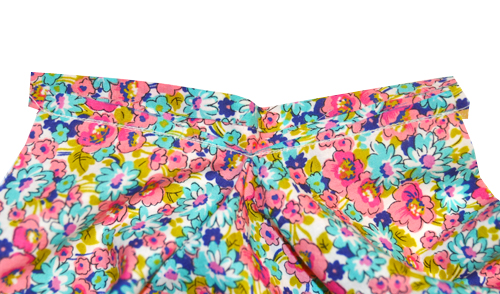
*Our apologies for the following picture. This one is a difficult one to show . . . E for effort?!?!? Maybe??

Adding a Placket {Oliver + S, Swingset Tunic}

Fold / tuck lining to neatly finish bodice area.

Adding a Placket {Oliver + S, Swingset Tunic}


Adding a Placket {Oliver + S, Swingset Tunic}

Handstitch and press to finish.

Adding a Placket {Oliver + S, Swingset Tunic}


Adding a Placket {Oliver + S, Swingset Tunic}

*Other “finishing techniques” we incorporated to make a clean finish: We did not trim any excess from the lining, but instead folded it under and covered the stitching line of the main yoke and ruffle.  Then, we handstitched the lining to the yoke before edgestitching {per directions} to finish the garment.

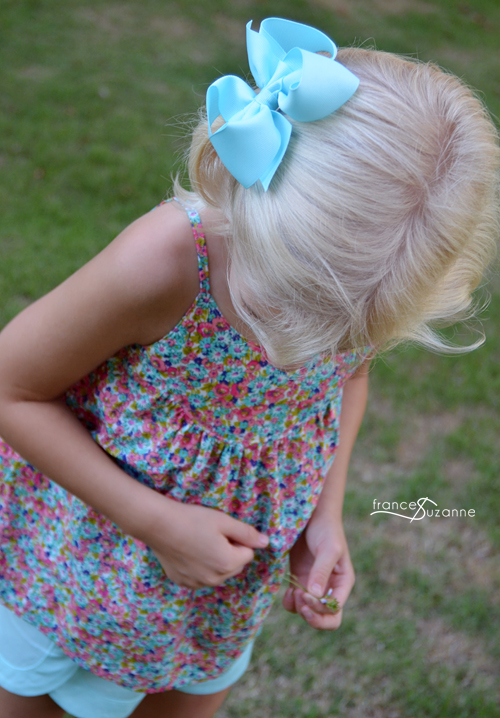
Minor disclaimer: The placket does not line up directly on top of one another once the buttons are sewn. Instead, it overlaps slightly to offset the button placement on the center back yoke. This doesn’t bother us at all, yet we felt it important to mention. The lightweight fabric, as well as the gathered ruffles disguise the overlap nicely, and the cleaner finish of the garment outweighs the overlap in our eyes.


Related Posts Plugin for WordPress, Blogger...


Tweet


2 Comments


Charity
7 yearss ago


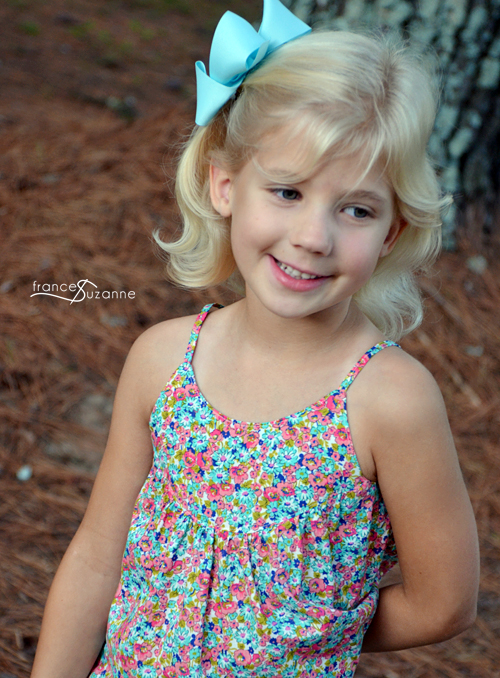
I love this kind of placket! And oh, that fabric is lovely!

(Reply)

    FrancesSuzanne
    7 yearss ago


    It might be our “current favorite fabric” . . .we just bought another colorway of it, we love it so much!!

    (Reply)


Leave a Reply


  Cancel Reply

  • Recent Comments

    • Broadway Fabrics on The Building Block Dress: Design Challenge
    • FrancesSuzanne on Sewing for Disney: Sleeping Beauty
    • designdreamer on Sewing for Disney: Sleeping Beauty
    • Lightning McStitch on Sewing for Disney: Sleeping Beauty
    • Jenny on Sewing for Disney: Sleeping Beauty
  • Subscribe Via Email

  • Find us on Facebook

  • Follow Us on Pinterest

    2280 Stockbridge Rd, Akron, OH 443132280 Stockbridge Rd, Akron, OH 44313White melamine craft room with raised panel door and drawer fronts and crown molding. Multiple workstations and large island for crafting while standing.
    This is carol byert fallerts studio plans, i like the sitting area, sometimes you just need to think, or read, or look at reference books ds or a laptop.note open space around island work areas.
    Inspiration for the Oliver + S Building Block Dress book.Vintage Pattern Butterick 3312 Girls' Dress 60s Size 6X by La-Prairie-Lady, via FlickrYUMMY! Why carry a plain, boring veggie tray when you can carry colorful, delicious Veggie Bars to your next get-together!
    Follow Me on Pinterest More Pins
  • Oldies, But Goodies

    <
    2021
    • 2021
    • 2020
    • 2019
    • 2018
    • 2017
    • 2016
    • 2015
    • 2014
    • 2013
    • 2012
    ▼
    >
    Jan0 Posts
    Feb1 Post
    Mar4 Posts
    Apr6 Posts
    May0 Posts
    Jun0 Posts
    Jul0 Posts
    Aug0 Posts
    Sep0 Posts
    Oct0 Posts
    Nov0 Posts
    Dec0 Posts
    Jan9 Posts
    Feb7 Posts
    Mar7 Posts
    Apr3 Posts
    May1 Post
    Jun1 Post
    Jul1 Post
    Aug0 Posts
    Sep5 Posts
    Oct0 Posts
    Nov1 Post
    Dec0 Posts
    Jan0 Posts
    Feb0 Posts
    Mar0 Posts
    Apr0 Posts
    May2 Posts
    Jun12 Posts
    Jul12 Posts
    Aug1 Post
    Sep6 Posts
    Oct3 Posts
    Nov1 Post
    Dec11 Posts
    Jan0 Posts
    Feb1 Post
    Mar0 Posts
    Apr4 Posts
    May7 Posts
    Jun5 Posts
    Jul0 Posts
    Aug0 Posts
    Sep0 Posts
    Oct0 Posts
    Nov0 Posts
    Dec0 Posts
    Jan3 Posts
    Feb4 Posts
    Mar5 Posts
    Apr3 Posts
    May2 Posts
    Jun4 Posts
    Jul0 Posts
    Aug1 Post
    Sep2 Posts
    Oct1 Post
    Nov0 Posts
    Dec0 Posts
    Jan1 Post
    Feb2 Posts
    Mar2 Posts
    Apr0 Posts
    May4 Posts
    Jun9 Posts
    Jul8 Posts
    Aug10 Posts
    Sep5 Posts
    Oct2 Posts
    Nov3 Posts
    Dec3 Posts
    Jan6 Posts
    Feb16 Posts
    Mar13 Posts
    Apr15 Posts
    May5 Posts
    Jun8 Posts
    Jul11 Posts
    Aug2 Posts
    Sep1 Post
    Oct2 Posts
    Nov5 Posts
    Dec5 Posts
    Jan18 Posts
    Feb12 Posts
    Mar13 Posts
    Apr16 Posts
    May12 Posts
    Jun17 Posts
    Jul18 Posts
    Aug16 Posts
    Sep21 Posts
    Oct15 Posts
    Nov10 Posts
    Dec6 Posts
    Jan9 Posts
    Feb6 Posts
    Mar6 Posts
    Apr6 Posts
    May11 Posts
    Jun17 Posts
    Jul19 Posts
    Aug14 Posts
    Sep18 Posts
    Oct10 Posts
    Nov16 Posts
    Dec17 Posts
    Jan0 Posts
    Feb0 Posts
    Mar0 Posts
    Apr0 Posts
    May0 Posts
    Jun9 Posts
    Jul8 Posts
    Aug5 Posts
    Sep5 Posts
    Oct11 Posts
    Nov5 Posts
    Dec10 Posts


  • About Us

    PeekABooAboutUs

    Hi everyone! We are two sisters who lovingly sew for our youngest sister’s children. We are so glad you are here and invite you to join our many sewing adventures! It would be an absolute honor to call you our friend!

  • Follow Us on IG

    No images found!
    Try some other hashtag or username
  • Recent Posts

    • An Oliver + S, Carousel Dress for the Oldest

      An Oliver + S, Carousel Dress for the Oldest

      April 22, 2021
    • A Carousel in the Zoo

      A Carousel in the Zoo

      April 19, 2021
    • And then there were more: Oliver + S, Playtime Tunics for a Tween

      And then there were more: Oliver + S, Playtime Tunics for a Tween

      April 15, 2021
    • Knit Playtimes for the Win!

      Knit Playtimes for the Win!

      April 12, 2021
  • Need Inspiration? Help?

    2280 Stockbridge Rd, Akron, OH 443132280 Stockbridge Rd, Akron, OH 44313White melamine craft room with raised panel door and drawer fronts and crown molding. Multiple workstations and large island for crafting while standing.
    This is carol byert fallerts studio plans, i like the sitting area, sometimes you just need to think, or read, or look at reference books ds or a laptop.note open space around island work areas.
    Inspiration for the Oliver + S Building Block Dress book.Vintage Pattern Butterick 3312 Girls' Dress 60s Size 6X by La-Prairie-Lady, via FlickrYUMMY! Why carry a plain, boring veggie tray when you can carry colorful, delicious Veggie Bars to your next get-together!
    McCalls 7929 Vintage 1960s Girls Dress pattern Size by bellaloona, $6.001960's girl's dress My Grandma made this pattern for my sisters and I!!!1960s McCall's 7994 Cutest Mad Men Era Girl's Five Panel Dress 60s Vintage Sewing Pattern Size 4 UNCUT
    Follow Me on Pinterest More Pins

Copyright © 2012 Nemesis Theme. Powered by Wordpress.
Wordpress theme by Peerapong
All images are copyrighted to their respective owners.