


Follow Us on Pinterest
Unable to load Pinterest pins for 'FrancesSuzanne'

Jul
15
The dynamic duo of sisters-in-law that create and share over at Simple Simon, Project Run and Play, and Project Sewn {three amazing blogs to follow} are in the midst of a wonderful event, Skirting the Issue {you can read more about it HERE}, and asked if we would like to share a simple skirt tutorial of our own along the way! Ummmm….OF COURSE!!

Skirting the Issue is all about gifting skirts to young girls / ladies that are currently in the foster care system.
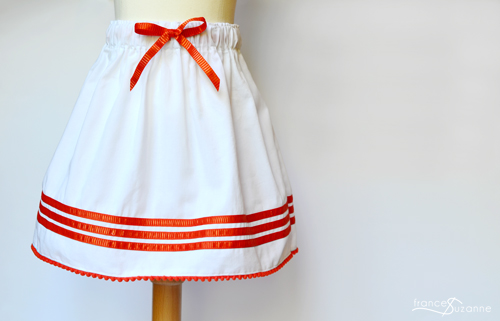
So, we did a little research…looking for a sweet, simple skirt from a popular clothing company that we could “knock off” for a fraction of the price AND give a tutorial on how to do it! We wanted to go with a “knock-off creation” because it would give a special little girl a skirt that was “fashion forward” without having the appearance of handmade.

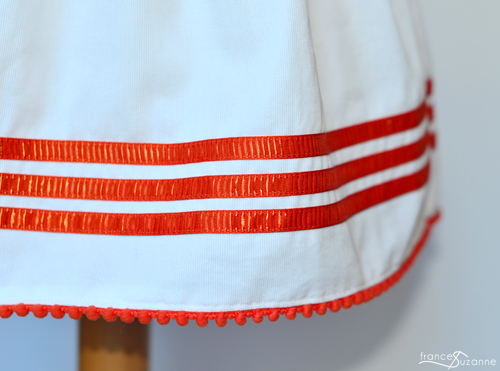
The J.Crew girls’ stripe pom-pom skirt {retail $59.50} fit the bill. And, while ours isn’t exactly like the original, we feel it gets the essence of the look.
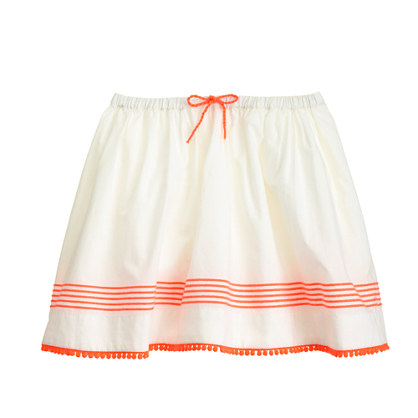
Source: J.Crew {girls’ stripe pom-pom skirt}
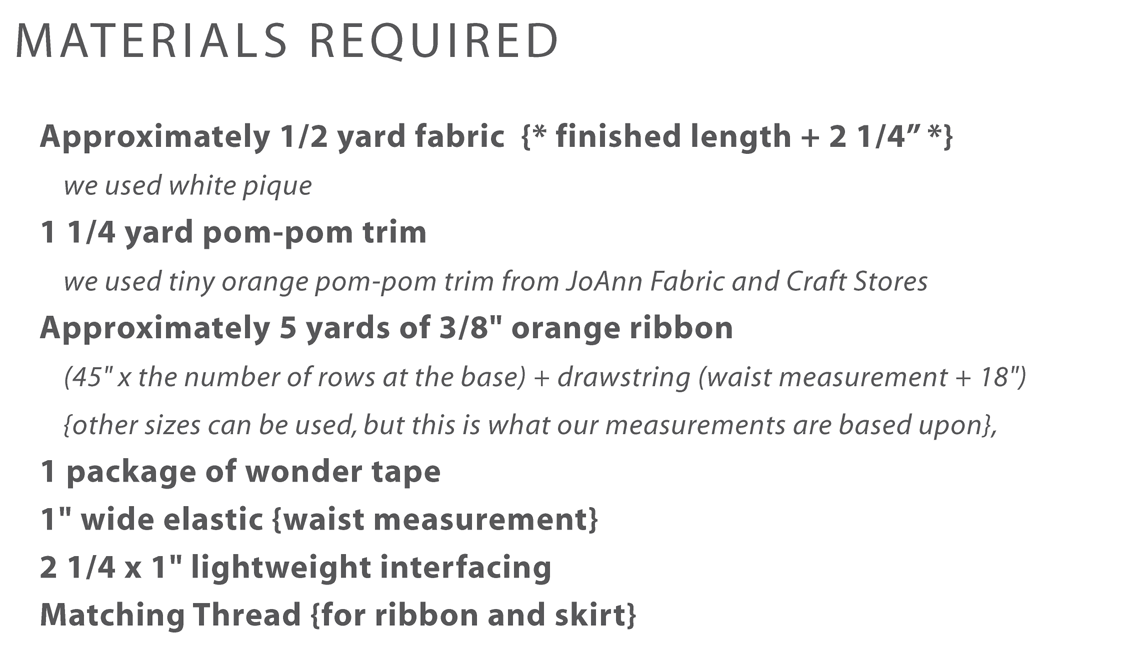
We had some white pique fabric left over from a previous project, and bought all other supplies/materials at JoAnn Fabric and Craft Store.
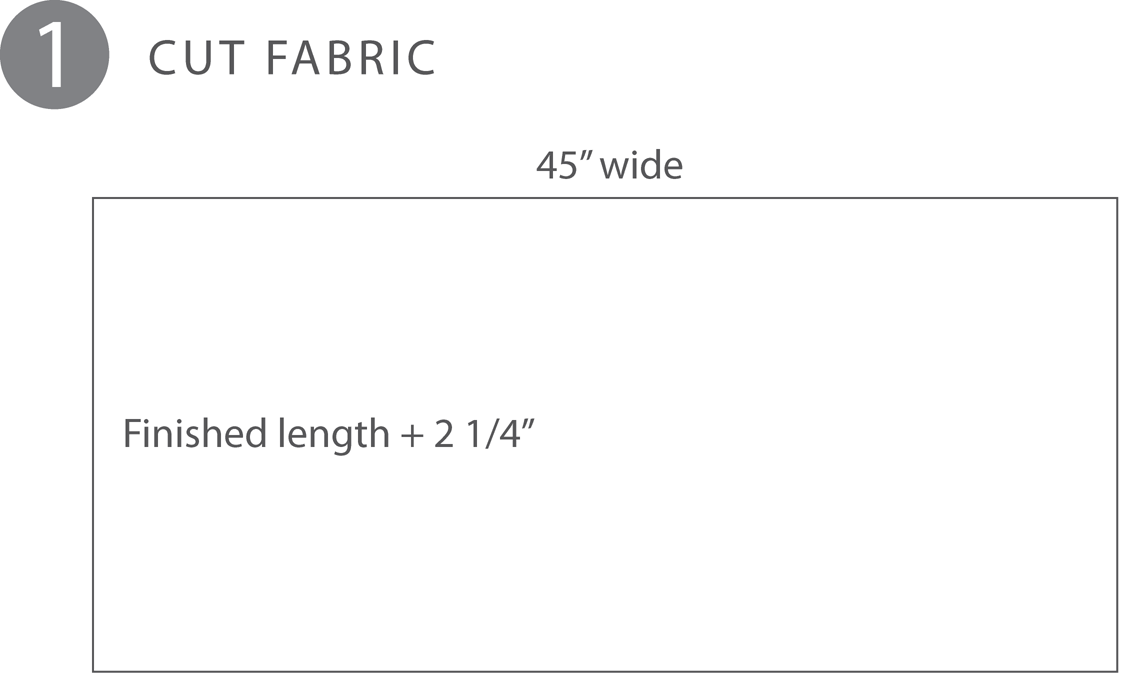
As for the measurements? Well, we guessed…using our oldest niece’s measurements {age 3} and the measurements of a dear blogging friend‘s youngest child. Since Emily teaches 1st grade, we wanted to make a skirt for a child between ages 5 – 7….putting a name behind the skirt, so to speak {even though we were going to pass the finished garment on to the proper services upon completion}. However, after cutting the skirt, we found this awesome measuring chart that liZ and Elizabeth had ready to use!! SO…we adjusted the amount of elastic used on the waistband, and ended up with a skirt for a size 4 child.
So, let’s get down to it….shall we?? **Our measurements are based on size 4 in the skirt measurement chart. If you are sewing another size, adjust your finished length and elastic for the waist to meet your needs.
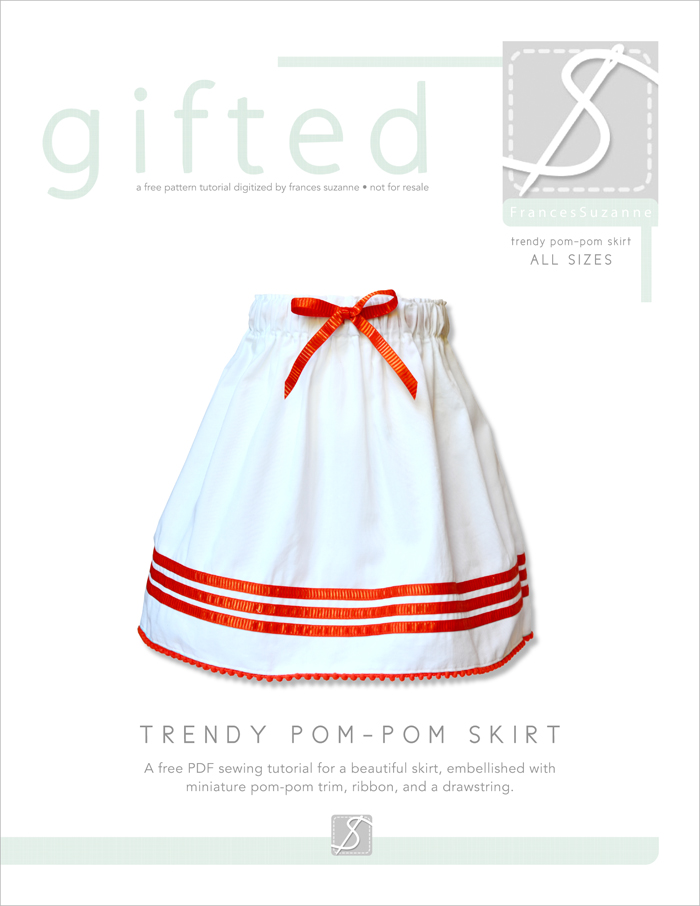
If you’d rather save a PDF of the tutorial directions, you may do so HERE…
• Serge or zig-zag the bottom edge of the skirt.
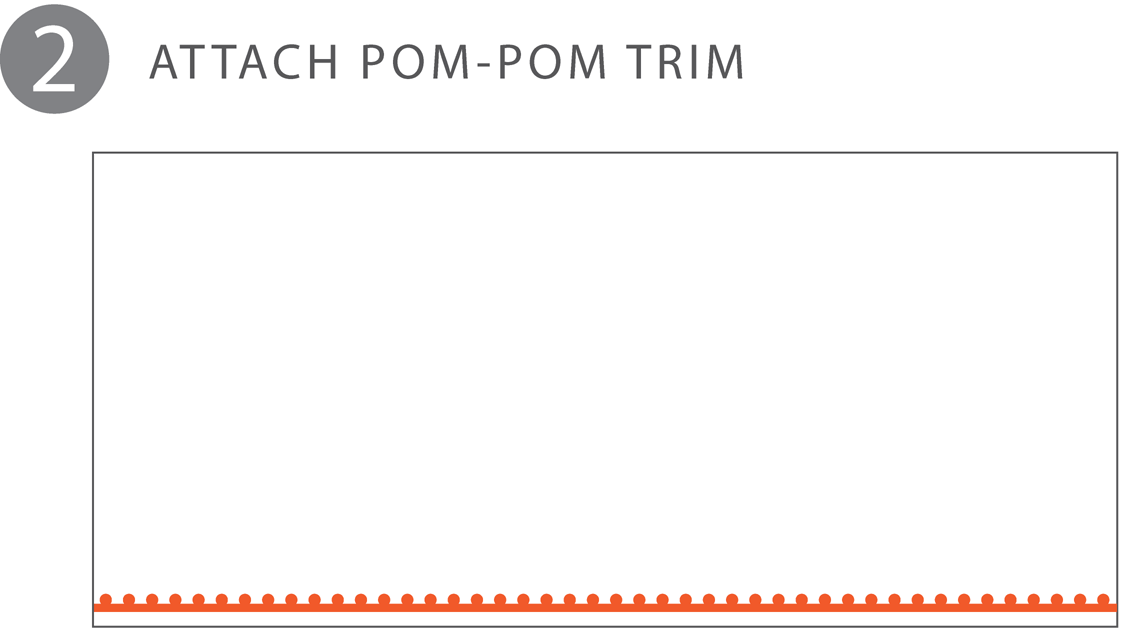
• Stitch pom-pom trim to bottom edge of skirt, right sides together, with 3/8″ seam. The pom-poms will be facing away from the bottom edge of the skirt.
• Press trim away from skirt, and topstitch seamed, serged edge to the main skirt.
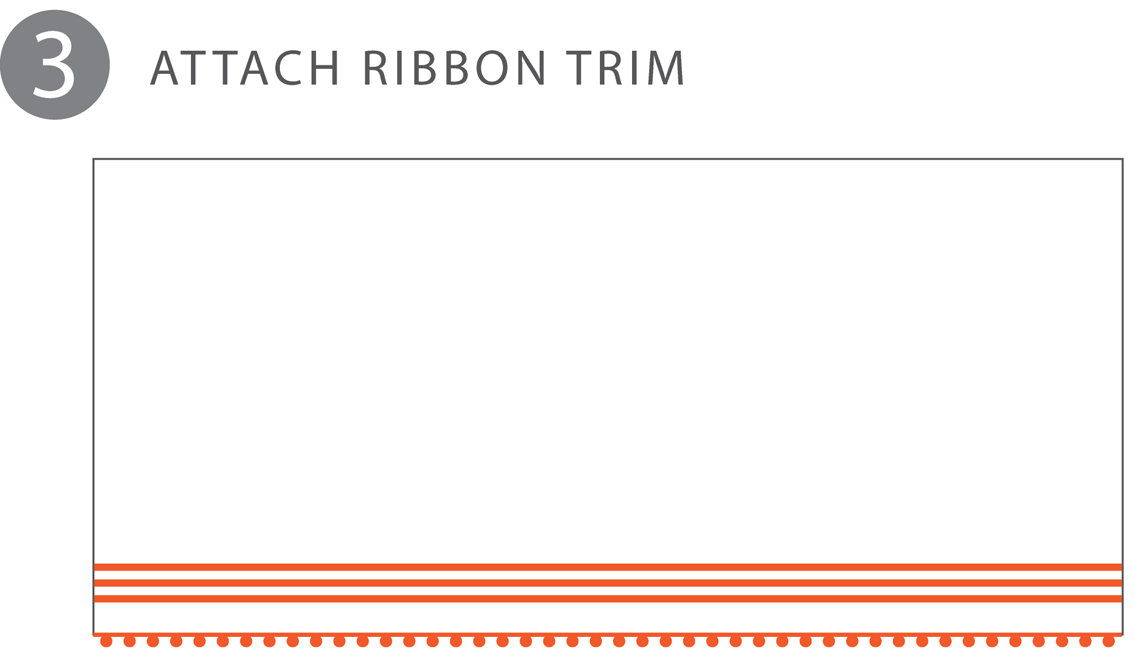
• With a water-soluble pen, mark the lower edge of the ribbon placement at 1 1/2″ above the pom-pom trim.
• Continue to mark lines at 5/8″ above the previously drawn marking for as many lines of ribbon you would like added to the skirt. Since we used 3/8″ ribbon, this allowed for 1/4″ of fabric to be shown between ribbons once they were attached.
• Place wonder tape along the edge of the marking, and then add the ribbon trim.
• Topstitch the ribbon in place along the upper and lower sides.
• Repeat until all rows of ribbon are attached.
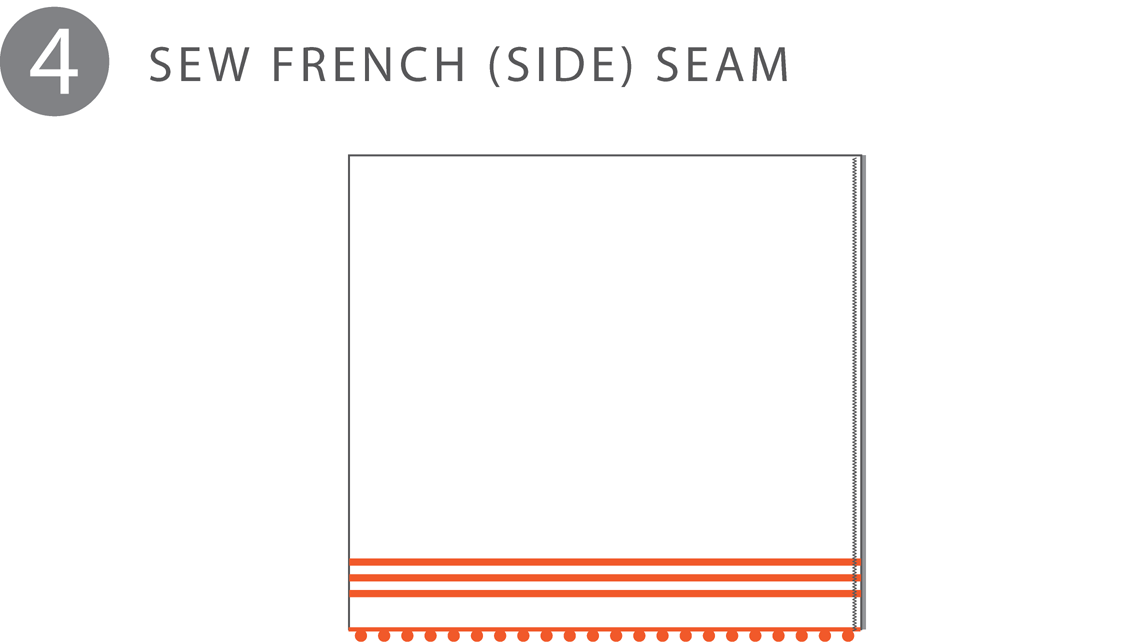
• Create a French seam for the side by placing the short ends of the skirt together, wrong sides together. Zig-zag at 2.5 length and 1.0 width, with 1/4″ seam allowance. Trim close to the stitching, and then press right sides together. Straight stitch to enclose the side seam at 1/4″ or less.

• Measure and find the center front of the skirt, by folding the skirt in half. Mark the center with a water-soluble pen.
• From the center mark, measure 1/2″ on either side for buttonhole placement, and 2 3/8″ from the top of the skirt {placement for the top of the buttonholes}.
• Iron a piece of interfacing 2 1/4″ x 1″ to the wrong side of the fabric, behind the marked buttonhole area for stability.
• Stitch buttonholes, and then open each using your preferred method.
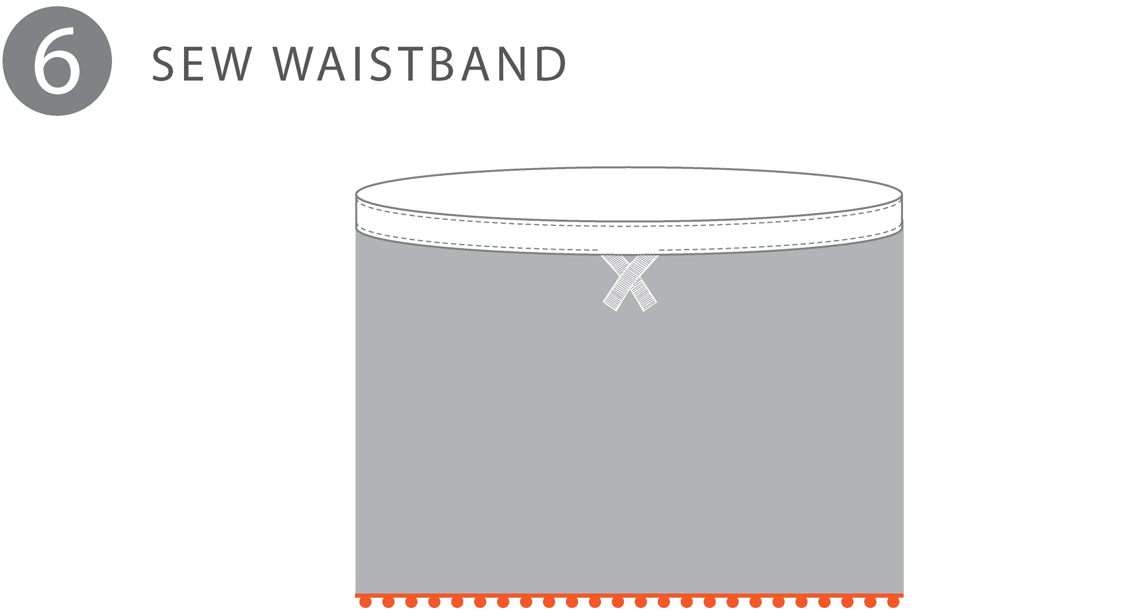
• To create the waistband, press 3/8″ skirt fabric to the wrong side, then press an additional 1 1/2″ to the wrong side. This will cover the previously made buttonholes, as well as create a casing for the elastic and drawstring.
• Unfold pressed waistband to add a size label to the back of the skirt.
• Stitch casing closed, leaving a 2″ opening near the size label for inserting elastic.
• Using a safety pin, insert the elastic {21″ for a size 4, per size measurement chart} through the casing. Overlap elastic at the edges and stitch elastic together. Insert elastic into casing, then stitch casing closed.
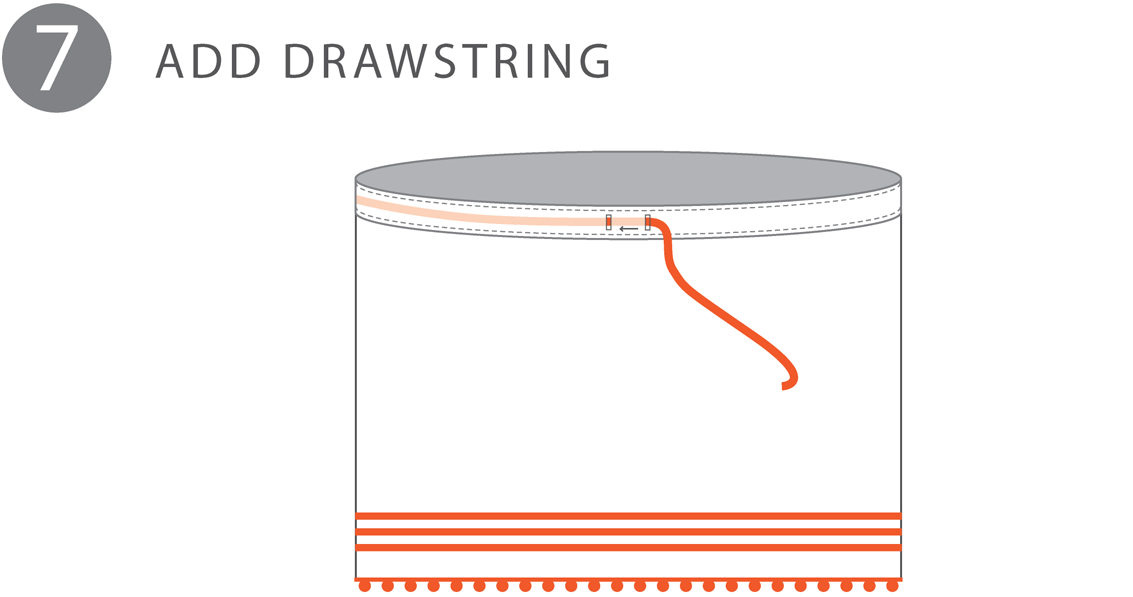
• Using a safety pin, insert the drawstring ribbon into the right buttonhole and feed it through the casing, going left {underneath the left buttonhole} and exiting through the left buttonhole once around the skirt. *This will alleviate some of the pressure on the buttonholes as they are used for drawstring purposes.
• Stitch over the casing in the center back to hold the drawstring in place.
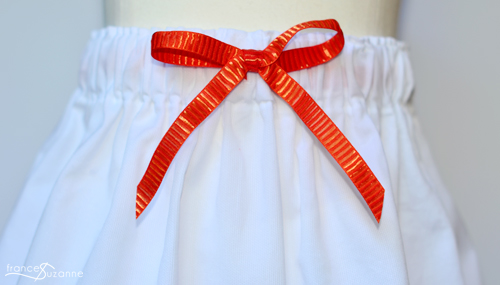
• Tie a bow, trim to desired length {there will be excess}, and fray check the ends of the ribbon!
Now….go and gift a skirt of your choice to a young girl / little lady that is currently in the foster care system! Currently, there is a linky party available for you to enter the skirts you plan to donate. Entries will be randomly selected for some spectacular prizes – including a Babylock “Elizabeth” Sewing Machine.
And, continue to follow Skirting the Issue over on Simple Simon for more sewing inspiration and skirt tutorials posted in the upcoming days….
*Please note: This post contains “affiliate links”, yet we do solemnly promise that all proceeds will be used to fund our fabric {and sewing} obsession!
Like what you see? We don’t want you to miss a thing….sign up to follow us on Bloglovin’!
![]()

Super cute!
I love the look of this skirt…so simple yet so elegant. Some little girl is going to feel very lucky!
What an adorable skirt!
This is beautiful – thanks so much for sharing
your version of the skirt is way way better than J.Crew’s
I like yours better than the original. I keep reminding myself how wonderful trim is, but I rarely use it.
THIS IS SO CUTE!!! And so simple! I love it! Perfect for Skirting the Issue!
Thanks everyone!! We HEART “simple”!! And, don’t utilize trim like we should either… Looks like making a smaller size for EA is in our future!
First of all, there is a huge difference in those skirts. Yours is WAY cuter and much better constructed. If JCrew gets $60, yours would get $100. Totally in love and making some as soon as I am able! Thanks for the tutorial… I can’t wait to try the drawstring.